friends - HOBNOB Magazine

Posts Tagged ‘friends’

Traditional Irish Toasts with Personality for St Patrick’s Day

Posted on: March 17th, 2022 by Ellen Swandiak

Traditional Irish toasts can come in handy for all sorts of occasions. We gathered a bunch to help you be extra witty and deliver heartfelt wishes with charm.

Get into the true Irish spirit by memorizing and quoting some of the loveliest toasts from the other side of the Atlantic. This will lend a sophisticated flair to your day of excessive imbibing.

—May the luck of the Irish be with you!

—Here’s to a long life and a merry one. A quick death and an easy one. A pretty girl and an honest one. A cold pint and another one!

—May you have the hindsight to know where you’ve been, the foresight to know where you are going, and the insight to know when you have gone too far.

—May you always have a clean shirt, a clear conscience, and enough coins in your pocket to buy a pint!

—May neighbors respect you, trouble neglect you, the angels protect you, and Heaven accept you.

—May the roof above you never fall in, and those gathered beneath it never fall out.

—May misfortune follow you the rest of your life, and never catch up.

—May you be poor in misfortune, rich in blessings, slow to make enemies and quick to make friends. And may you know nothing but happiness from this day forward.

—May your home always be too small to hold all your friends.

—May you live as long as you want and never want as long as you live.

—May your heart be light and happy, may your smile be big and wide, and may your pockets always have a coin or two inside!

—May you have food and raiment, a soft pillow for your head. May you be forty years in heaven before the devil knows you’re dead.

—May you get all your wishes but one, so that you will always have something to strive for!

Grain-Free Crunchy Bagel-Style Almond Crackers

Posted on: April 12th, 2020 by Ellen Swandiak

A crunchy cracker you can make with pantry ingredients. Those who are trying to be gluten and grain free often get the craving for the crunch. That’s where these grain-free crackers, made with almond flour, come in to save the day.

Between the poppy and sesame seeds, my favorite bagel toppings, these grain-free crackers not only taste fab, but make for a spectacularly speckled  presentation. Not to mention the nutritional benefits of the seeds. 

MAKES ROUGHLY 40 PIECES

PREHEAT OVEN 325ºF… MAKE THE DOUGH

1 3/4 CUP almond flour
1 TB almond oil
1 egg, beaten

In a large bowl combine all ingredients, knead well, and shape into a ball. Place onto a sheet of parchment paper that fits a baking pan. Transform dough ball into a rectangle echoing the shape of the parchment. Top with second piece of parchment and roll out dough to between 1/16- and 1/8-inch thickness. I like keeping the edges ragged so the tips will get more brown. You may need to fill in some holes as the dough escapes the parchment, so just break off those parts and fill in as necessary.

PREPARE SEED MIX

1 TB sesame seeds
1 TB poppy seeds
1 TB golden flax seeds
1 TB sunflower seeds
1/2 tsp sea salt

In a small bowl, mix thoroughly. Sprinkle evenly over rolled-out dough. Cover with clean parchment paper and roll over to set seeds into the dough.

BAKE THE GRAIN-FREE CRACKERS

Bake for roughly 23 min till edges are slightly browned. Move with parchment to a cooling rack and let sit for 10-15 min. Break apart by hand into irregular shapes. Store in an airtight container. Try not to eat them!

If you like this recipe, you might want to take a look at our Cumin -Spiced grain-free crackers too.

Celebrate Spring: Chantarelle and Foraged Fiddlehead Pizza

Posted on: March 19th, 2020 by Ellen Swandiak

At this month’s party, foraged ingredients make an artistic statement on fiddlehead pizza. Take advantage of the season—and the subtle taste of fiddleheads (which are immature ferns) and have a light asparagus taste—and match them with bright orange chanterelle mushrooms.

For the base, some puff pastry and a combination of ricotta and scharfe maxx cheeses creates a luxe pairing, plus a creamy bed for these earthy ingredients. This pizza will surely make a statement at your gathering, and celebrate Spring’s wild bounty.

MAKES 12 MINI PIZZAS

MAKE THE BASE… THAW PASTRY 40 MIN

1/2 box Pepperidge Farm Puff Pastry (makes 3 long pieces)

Preheat oven to 400ºF. Unfold thawed pastry and cut into thirds to achieve long sections. Bake for 15 min. While still hot, push gently down on the tops of the puff with a spatula to create the valleys for toppings.

PREPARE FIDDLEHEADS & CHANTERELLES

1/4 LB fiddleheads
1/4 LB chanterelles

3 TB EV olive oil
1 clove garlic, minced
sprinkle of red pepper flakes

Triple-wash fiddleheads thoroughly. Trim brown parts. Blanche for four min and move to an ice bath. Drain and set aside. Clean mushrooms with a soft brush to remove all dirt. Cut mushrooms decoratively, keeping in mind how you they will look on the pizza.

Heat oil in a medium skillet. Add garlic and red pepper flakes to the fiddleheads and chantarelles, saute for 3 min.

PREPARE THE CHEESE

1/2 LB fresh ricotta cheese
s + p
1/4 LB scharfe maxx cheese

In a bowl, season ricotta with s + p to taste. Shred the scharfe maxx cheese and place in a separate bowl.

PREHEAT OVEN 400º… CREATE THE FIDDLEHEAD PIZZAS

puff pastry
ricotta cheese
scharfe maxx cheese
ramps, cut in half vertically (optional)
dandelion leaves, cut into small bits, for garnish

When puff pastry has slightly cooled, add 3 dollops of the ricotta, spread evenly over the entire surface of each pastry, then sprinkle the scharfe maxx. If using, place 1-2 ramps lengthwise on the cheese, then spot the fiddleheads and chantarelles around the entire surface. Bake for 5 min on the oven’s top shelf. Remove from oven and toss on the dandelion leaves. Cut each long piece into 4 minis.

A Colorful and Festive Scallop Ceviche with Blood Orange Sauce

Posted on: February 12th, 2020 by Ellen Swandiak

A Valentine’s Day dish. Winter is the season for blood oranges, and the brightness of their juice makes for a festive scallop ceviche indeed. Add the sprinkling of jalapeño pepper bits and pomegranate for an extra happy touch.

I included this recipe in our Aphrodisiac party menu specifically to create a stir. The color red is purported to arouse passion. So I’ve included not only the blood orange juice, but a sprinkling of pomegranate arils—which also adds a nice crunch. Let’s get the night going! The goddess Aphrodite is credited with planting the first pomegranate tree which has since been associated with fertility.

If serving for a crowd, plate individually in clear plastic glasses, with diced ingredients as a topping.

MAKES ENOUGH FOR 4

PREPARE THE SCALLOPS

1/2 LB bay scallops
1/4 CUP lime juice, freshly squeezed (about 2 limes)
1/4 CUP pink grapefruit juice, freshly squeezed (about 1/2 grapefruit)

Cut scallops horizontally into 3 pieces. Toss ingredients together in a nonreactive bowl. Cover and refrigerate for at least 2 hours.

HOBNOBMAG scallops CEVICHE marinade

MAKE THE BLOOD ORANGE SAUCE

1/2 CUP blood orange juice (about 1-2 oranges)
juice from 1/2 lime
juice from 1/2 lemon
1 TB EV olive oil
1/2 tsp soy sauce
squirt of sriracha
s +p

Mix the ingredients together in a small bowl or pitcher. Cover and refrigerate till ready to use.

PUT IT ALL TOGETHER

1 pink grapefruit, cut into supremes
2 TB cucumber, diced
1/2 jalapeño, diced
garnish:
1 TB fresh mint, cut into thin strips
pomegranate arils
1 watermelon radish, thinly sliced (optional)

Remove scallops from refrigerator, drain excess liquid. Set up your plating dishes. Arrange scallops, alternating citrus in between. Spoon the blood orange sauce over a little at a time, do not drown. Sprinkle cucumber and jalapeño. Garnish with mint, pomegranate, and radish.

Spicy Baked Buffalo Wings

Posted on: February 1st, 2020 by Ellen Swandiak

Touchdown this SuperBowl Sunday with these Spicy Baked Buffalo Wings that even the fittest athletes can’t say no to. This recipe is courtesy of Gozney, a company that makes the coolest and most powerful mini pizza ovens for your backyard (see more on the ovens at this link). Instead of deep-frying the wings, try Gozney’s technique for creating crispy skin while keeping the meat to remain incredibly moist inside. You can learn the tricks to crispy skin and more in this educational and entertaining step by step video here.

SERVES 4

See more recipes for watching the game, like Sirloin Steak Toasts with Zesty Crumbs, at Hobnob’s Party #18 Classy Sports: An Upscale Menu for Watching the Big Game

PREPARE CHICKEN A DAY AHEAD

2-3 TB plain flour
1/2 tsp baking powder
1 TB salt

12-16 chicken wings, a mix of wingettes and drumettes

This step allows for the chicken skin to get crisp, by removing all the moisture: Toss first three ingredients together in a bowl. Separate the wings from drumettes by cutting through the knuckle if they are still attached. First remove excess moisture from the skins by placing chicken between two paper towels and pressing down, then dredge in the flour mixture, shake. Set on a cooling rack and refrigerate overnight, uncovered.

MAKE THE BLUE CHEESE DIP

1 CUP sour cream
1/2 CUP buttermilk
4 oz blue cheese (gorgonzola or other soft blue)

Mix thoroughly in a bowl. Season to taste, if needed. This can be made a day ahead, and would allow the flavors to really meld.

MAKE THE SAUCE

6 TB Unsalted Butter
8 TB Franks Hot Sauce

While the chicken is cooking, melt ingredients together and keep warm.

PREHEAT OVEN 400ºF…COOK THE WINGS

Lightly heat a cast iron grill pan in the oven, about 5 min. Add chicken and cook for about 30-35 mins, rotating and flipping a few times. When skin in nice and browned, remove from oven and use tongs to dip the wings in warm hot sauce, transfer to a plate. Serve with blue cheese dip in a bowl alongside the wings.

Spinach Crepes with Two Savory Fillings

Posted on: January 28th, 2020 by Ellen Swandiak

Crepes are one of the first things I learned to cook as a child because I loved them so much. These have the addition of spinach, giving them a lively green color and a slightly more earthy taste. Using spelt flour and oat milk also makes them more up-to-date than your typical white-flour-milk variety. Make sure to let the batter rest before cooking, otherwise they will tear when rolling. You can even make the batter the night before for fantastic results.

When cooking the crepes, the first one in the pan is the test. With this result, you can determine if you need to thin out or thicken the batter, and if you need to adjust the flame up or down.

Using fresh spinach gives the crepes a brighter green color, but you can also use defrosted frozen spinach in a pinch. The two fillings: Salmon and Arugula in Lemon-Dill Cream Sauce and Cauliflower, Brussels Sprouts, and Yellow Squash in Tahini Garlic Sauce add to the decadence of the crepes.

MAKES 10 CREPES (CUT THEM IN HALF OR THIRDS TO SERVE)

MAKE THE BATTER

6 eggs
2 CUPS spelt flour
2.25 CUPS oat milk
1 bunch spinach, roughly chopped
1 tsp salt

Split the ingredients in half, and make the batter in two batches in a food processor. Blend on high speed until smooth. Move to a large bowl, combine both batches. Let rest at least 20 min to allow the mix to fully combine. 

COOK THE CREPES

butter
batter

In 9-inch non-stick skillet, add about a tsp of butter to the pan, and melt. Pour a ladle’s worth of batter into the pan, then add about another half, so when you twirl the pan around the batter goes all the way to the edge.

Fry for about 2 min, until bottom has golden touches. Run a spatula around the edges and carefully flip over. Fry for one more min or so. (Once you make the first crepe, and the pan is nice and hot, the rest should not stick.) Transfer to a plate and repeat with the rest of the batter.

FILL THE CREPES

cooked crepe
filling (recipes follow)

Fill the crepes as they come off the pan, allowing a minute or so for them to cool a bit. Spread 3 TB of desired filling, leaving the bottom inch clear, and top 1.5 inches clear (as seen in the photo below). Roll tightly, pushing down so there is no air. Place on serving plate with open end underneath. Crepes are good at room temperature, or even cold, so great for a buffet situation.

hobnobmag Recipe Spinach Crepes

Filling: Salmon and Arugula in Lemon-Dill Cream Sauce

A rich salmon and cream gets a kick of arugula, to add some bite. Cooking the salmon in the microwave speeds things along.

ENOUGH FILLING FOR 5 CREPES

Lemon-Dill Cream Sauce

START THE SAUCE

3 TB butter, cut into chunks
4 oz cream cheese, cut into chunks
1/4 CUP vegetable stock
juice from 1/2 lemon
1 tsp lemon zest
1 tsp salt
1/2 tsp white pepper

Cook gently over very low flame while whisking, about 3 min. Allow to cool.

FINISH THE SAUCE

lemon cream mixture
3/4 CUP sour cream
white part of 3 scallions, cut into thin rings
1 TB dill

In a small bowl mix all ingredients well.

COOK THE SALMON

1 1/4 LB salmon fillet
s + p

Cook salmon in microwave: Place on a microwave safe dish, cook on hight for 1 min. Check to see if cooked through, add time in 30 sec increments till fully cooked. Allow to cool. Shred with a fork. Move to large bowl.

FINISH THE FILLING

salmon
4 CUPS arugula, chopped finely
1/4 CUP pumpkin seeds, chopped finely
Lemon-Dill Cream Sauce

Toss all ingredients together, adding the sauce a little at a time. Don’t oversauce the mix or it will ooze out of the crepes.

hobnobmag Recipe Spinach Crepes

Filling: Cauliflower, Brussels Sprouts, and Yellow Squash in Tahini Garlic Sauce

This vegetable medley adds a striking vegetarian addition to the spinach crepes. The tahini really adds a special flavor and richness.

ENOUGH FILLING FOR 5 CREPES

Tahini Garlic Sauce

MAKE THE SAUCE

1/4 cup tahini
juice of 2 lemons
2 TB olive oil
2 cloves garlic, squeezed in a garlic press
1/4 tsp agave
1/4 tsp salt
1/4 tsp pepper

water

Whisk ingredients together in a small bowl. If too thick, add about a tsp of water to thin it out.

Cauliflower, Brussels Sprouts, Yellow Squash Medley

SAUTE THE VEGGIES

10-15  brussels sprouts, cut into thin strips (or processed in food processor)
1 head cauliflower, riced in food processor
2 yellow squash, shredded
6 TB butter

Saute each ingredient separately in a large pan with 2 TB butter. Allow to sit on the pan about 3 min, so the edges get nice and brown, stir, total cook time 5-6 min each batch. (Don’t crowd the pan, you may have to do each ingredient in two batches.) Toss together in a large bowl.

PUT IT ALL TOGETHER

Tahini Garlic Sauce
cooked veggies

Add sauce to the veggie medley, and mix well. Do not overdress.

hobnobmag Recipe Spinach Crepes

Roasted Delicata Squash Rings

Posted on: October 23rd, 2019 by Ellen Swandiak

Sliced delicata makes a great presentation, with its flowery silhouette and striped edge. It also cooks a little more quickly than other squashes, and the fact that you can keep the skin on is a prep time-saver. The taste is delicately sweet, which works nicely with a nutty topping, and the tangy sweetness of the balsamic-honey-lime syrup. This is the first of the secret ingredients in Hobnob’s Hidden Secrets party menu.

The secret topping: shiso leaves which add a mint-basil burst and a great texture. They come in green and a dark purple for added vivid color to the dish.

The pearl couscous pulls the dish together and gives it weight, perfect for serving at a party—it will soak up the imbibing well. Tip: do not make the couscous the night before, it will be a sticky mess. I tried to get ahead of things, but had to make a fresh second batch the day of the party.

MAKES A LARGE BOWLFUL, ABOUT 50 SMALL PORTIONS

recipe step: cut delicata squash into rings

PREHEAT OVEN 400ºF… ROAST THE SQUASH

5 med delicata squash
3 TB grapeseed oil
1/4 tsp salt
pinch cayenne pepper

Slice each squash in half horizontally and scoop out seeds with a spoon, then cut into 1/2-inch slices, discarding the ends. In a large bowl, toss squash slices in oil, s + p.

On 3 parchment-lined baking sheets arrange slices in a single layer. Roast until lightly golden, about 40 min. (Flip slices around 20 min).

Depending on your oven size, switch order of trays from top to bottom during cooking. You’ll notice the top tray getting browner faster, so you might need to pull out one tray before the others.

MEANWHILE MAKE THE PEARL COUSCOUS

3 CUPS water
2 CUPS pearl cous cous

Bring water to a boil, add couscous. Lower heat, simmer covered about 10 min. Let stand covered 2-3 min. Fluff with fork. Add a touch of olive oil to keep it from sticking together.

MAKE THE BALSAMIC-HONEY-LIME SYRUP

3 TB honey
1/2 CUP white balsamic vinegar
1 large lime, zested and juiced

In a small saucepan combine ingredients, bring to a gentle boil. Simmer for about 12 min till the mix becomes syrupy.

recipe step: roast delicata squash rings till brown on the edges, then slice into bite-size pieces.

FINISH THE DISH

roasted squash rings, cut into bite-size pieces
Balsamic-Honey-Lime syrup
1/3 CUP hazelnuts, chopped and toasted
shiso leaves, cut into ribbons

In a large bowl, drizzle squash with syrup, but don’t drown, then sprinkle with nuts, toss together. Top with shiso ribbons last, and mix again. Add a few more shiso leaves on the top for garnish.

Put out the big bowl for guests to serve themselves on a buffet, or to accommodate roving guests, supply small bowls (we used bamboo recycled bowls and spoons) and portion out for guests to grab and go.

recipe step: place roasted delicata squash into small eco-bowls for a grab and go party buffet.

See more recipes with secret, surprise ingredients in Hobnob’s party #22 Hidden Secrets at this link.

Kielbasa Canape With Mustard & Cornichon

Posted on: October 23rd, 2019 by Ellen Swandiak

Since I grew up in a New York-Slovakian household, I developed a love for this pork product. If fresh bacon could have added garlic in it, this would be it.

If you have a local Eastern European market near you, then you must seek this out. In Manhattan, there is an East Village holdout which has exceptional varieties, some more smoked than others (and they ship). It’s your party hosting best friend in that it can be boiled, roasted, fried, or just sliced as is. Once you try, you will be hooked. If so, you can try Hobnob’s other recipe: Kielbasa & Tortellini Bites with Smoky Paprika Oil, which pairs the kielbasa with pasta and a smoky blast.

(Tip: Do not substitute the product called kielbasa that you may find in your local supermarket, it is nothing like the real thing.)

See more recipes with secret, surprise ingredients in Hobnob’s Hidden Secrets party menu.

MAKES ABOUT 50 BITES

MAKE THE BITES

1 ring of thick kielbasa

baguette

dijon mustard

cornichon

Cut the kielbasa into 1/4-inch slices. Top a slice of baguette of roughly the same size. With a small spoon, add a dollop of mustard. Cut cornichon in half lengthwise so it sits flat atop the mustard.

See more recipes with secret, surprise ingredients in Hobnob’s party #22 Hidden Secrets at this link.

Unusual Flavored Cheeses For Cheese Board

Posted on: October 23rd, 2019 by Ellen Swandiak

As part of the menu for Hobnob’s Hidden Secrets party, I thought that a bevy of secret ingredients should be included. Truth be told, I discovered two of these cheeses at a neighbor’s gathering—it’s so nice to have foodie neighbors, we share meals on a regular basis, and there’s often a discovery in the mix.

Trader Joe’s cheddar with caramelized onions is a unique taste sensation, with extra tang and a creamy consistency. I got the Moliterno black truffle pecorino at Fairway, and it too adds a heady truffle punch, to a strong pecorino. Heaven. The onion and chive double gloucester fit right in with the crowd.

By the way, when putting cheese out, I like to slice half the slab to encourage guests to pick. I find if you don’t cut into it, people are reluctant to cut on their own. This makes it easier to partake.

SERVES 25 WITH ACCOMPANIMENTS

ASSEMBLE THE CHEESE BOARD

2 Trader Joe’s Cheddar Cheese with Caramelized Onions

2 Cotswald Double Gloucester with Onion and Chives

2 Moliterno Black Truffle Pecorino

Set cheeses out on two separate boards, and fill with your choice of accompaniments:

-sprigs of grapes, cut into smaller clusters

-small bowl of olives (include a discard dish for pits nearby)

-small bowl of nuts

-fig jam

-crackers or slices of baguette

See more recipes with secret, surprise ingredients in Hobnob’s party #22 Hidden Secrets at this link.

Vegan Meat: Instant Plant-Based Party Bites

Posted on: October 23rd, 2019 by Ellen Swandiak

For The Hobnob Party launch (Hidden Secrets), we offered the collection of Fry Family Foods varieties, and got feedback from every guest. The secret: What people thought were burgers, chicken nuggets, mini schnitzels, breaded prawns, and falafel were not. It was a party hit, and most were surprised that these imposters were plant-based.

You must watch the heartwarming video, which tells the story of the brand. The Fry Family goal: to create high protein foods with great texture and consistency, and most importantly, to be enjoyable.

Vegan Meat Fry Family Foods at a party

Chickpea and Roasted Butternut Balls

Seasoned with fresh sage and cumin, and rolled in a light crumb, these golden bites could be served with your favorite dip. Ball-shaped bites are always welcome at a party. (see more ideas for serving various bites in Hobnob’s HAVE A BALL party menu)

Quinoa and Brown Rice Protein Burgers

Seasoned with rosemary, marjoram and sage, and rolled in a light gluten free crumb, just bake for 15 min, and serve. We got some potato buns, and cut the patties into four, to create the slider version of these, and topped with a True Made Foods Vegetable Ketchup.

Vegan Meat Fry Family Foods at a party

Soy and Flaxseed Schnitzels

Flavored with fresh cilantro, and lightly coated in a flax & sunflower seed crumb, we served these schnitzels on a dark-brown rye bread, on a swath of The Good Spoon Curry Vegan Mayo. (see other vegan mayo recipes here)

Rice Protein & Chia Nuggets

Resembling chicken nuggets, these little bites had a satisfying texture and taste.

Battered Prawn-Style Pieces

Somehow this item did not make it into Hobnob’s party photos (we were having too much fun!), but were passed around with a cocktail sauce dip, and did feel like a shrimp alternative. 

Every year, the Fry Family put up a chart on the website to show how many animal lives would be saved if someone had chosen a Fry’s Product instead of a meat product. Last year that number was 10,055 pigs, 647,737 chickens, 11,354 cows, and 3 million prawns. fryfamilyfood.com

See more recipes with secret, surprise ingredients in Hobnob’s party #22 Hidden Secrets at this link.

Cookies for Dessert

Posted on: October 23rd, 2019 by Ellen Swandiak

When throwing a party there are certain shortcuts that save time, yet still have maximum impact. When I plan a menu, aesthetics is one of the factors and portion size another. These cookies for dessert fit both requirements, and allow guests to have a little sampling of sweetness without over doing it. You can get better cookies even at a local deli if you know what to look for. Here are the cookie choices we made for this gathering: 

Hint-O-Mint Newman-O’s

Paul Newman’s founded company gives all its profits to charity, so that’s reason enough to support the brand, but the taste of these cookies shine, and are curiously addictive. So, Oreos move aside! There’s a new cookie in town. The hint of mint makes these guys way more sophisticated.  newmansown.com

Loacker Quadratini

These wafer cookies were a childhood favorite of mine, they literally melt in your mouth. What’s lovely about these is the mini portion, they come in 1-inch cubes. I chose my two go-to flavors for the  Hidden Secret party, whose menu includes secret ingredients in every bite—Hazelnut and Coconut—but the line also includes: Chocolate, Dark Chocolate, Vanilla, Lemon, Capuccino, Tiramisu, Espresso, Raspberry Yogurt, Blueberry Yogurt, Cocoa and Milk, and Matcha.

Loacker makes its cookies where air and water are pure and fresh, and nature is still intact: in the heart of the Dolomites. Now in its third family generation, the best natural ingredients continue the tradition founder Alfons Loacker started in his little patisserie in Bozen in 1925. loacker.com

photo at the top of this post, right: For an easy party lighting trick, add a string of LED blue lights to a counter. I got these at my local lighting store (which are dotted around Manhattan) who carry the longer lengths. Lighting and Beyond, 35 W 14th St (betw 5/6)

See more recipes with secret, surprise ingredients in party #22, Hidden Secrets, at this link.

Skirt Steak Pinwheels: A Rare Steak Treat

Posted on: June 16th, 2019 by Ellen Swandiak

Steak lovers, here is a rich recipe that adds much fanfare to just a grilled steak. Skirt steak pinwheels take butterflied skirt steak, pounded thin, then rolled up with cheese inside. It’s a way to wow dinner guests with something different and special.

The stuffed skirt steak pinwheels make a graphic statement of red and white, with the spiral of cheese, which is why I included this recipe a part of our 4th of July menu for a buffet, where all the food is red and white. Tip: Good skirt steak can be a little pricey, but pounding them thinly allows you to stretch your dollar. Make sure to start with it butterflied from the butcher, unless you have good knife skills.

Skirt steak has nice marbled fat, which is why I chose it over flank steak, for its extra richness of flavor. Two important tips: When rolling the steaks into logs, make sure the grain is parallel to the length of the roll. That way when you cut the spirals you will be cutting against the grain. Two: Do not overcook it—you want all those juices intact.

Another very important point, choose a cheese that does not melt easily, like a halloumi or paneer, or the Yanni Grilling Cheese with  jalapeño as I did here.  That way the cheese will stay inside the steak (not melt out and make a mess of your pan. I tried this recipe with three other cheeses until I got it right!). But it was fun eating the mistakes.

MAKES 16 SKEWERED BITES OR 32 HALF SLICES

PREPARE THE STEAK

1 1/2 LB skirt steak, butterflied
grapeseed oil
s + p
grilling cheese, cut into 1/8” slices

Cut steak into 6-inch lengths. Pound till about 1/8 to 1/4-inch thick. Trim odd sections (throw in pan as a snack while cooking!) Spread oil on both sides of steak, sprinkle salt and pepper inside. Line cheese slices inside the fatty side of the meat, leaving a little free space at the top. Roll tightly. Tie at 2” intervals. Trim ragged ends.

HOBNOBMAG steps to make skirt steak pinwheels

SEAR THE STEAK

1/2 TB grape seed oil

In a large skillet heat oil on medium-high heat. Sear steak for one minute each on all 4 sides, until nice and brown. Remove from pan and let sit for a few minutes. (At this point you could put aside and cook when you are ready to serve.)

HOBNOBMAG steps to make skirt steak pinwheels

FINISH COOKING STEAK

seared steak rolls
thyme, broken into snippets
EV olive oil

When slightly cooled, insert 4 large bamboo skewers into each roll through the top fold, in order to secure. Cut in between each, so you end up with 4 spirals. Push skewer completely through.

Cook each piece with spiral facing up about 2 minutes on each side using the skewer to flip. Remove from pan, discard twine. Serve as is with skewer, or remove skewer and cut in half to reveal the cheese spiral design. Sprinkle thyme snippets, and drizzle EV olive oil to decorate the plate.

First Blush: Celebrating Rosé in a Summer Cocktail

Posted on: June 16th, 2019 by Ellen Swandiak

This summer cocktail features an unusual mix of sweet, bitter, and fruity flavors that play with bouncing blueberries. See the cocktail recipe and the exceptional ingredients used in the mix.

A light sipper accompanies red and white bites on the buffet. Garnish with blue or white straws if you have them.

DETAILS ON THE INGREDIENTS:

[1] Hangar One Handcrafted Vodka

Since launching in an airplane hangar in 2002, HANGAR ONE’s handcrafted vodkas have won fans around the world, so rest assured you will be tasting an exemplary spirit here. The creators were not happy with the “straight” vodkas that were in the market, so they decided to take matters into their own hands and create something new. Known for distilling brandies, Ansley Coale and Jorg Rupf started with wheat from the midwest, then combined that with a California Viognier grape eau de vie. The Viognier grapes are distilled using the whole fruit—including the stem, leaves, skin and blossoms, thus capturing its full flavor profile. Then, by distilling the same day it’s picked, flavor is captured at its peak. The vodka is known for its smoothness. Besides “straight” there are three infusions to choose from: Mandarin, Citron, and Kaffir Lime, all lovingly created. Available online at reservebar.com (check your state’s shipping details). About $35. hangarone.com

hobobmag summer cocktail

[2] Lillet’s Rosé Wine

Can you think of anything more suitable for a hot summer night than a nice glass of rosé? The debut of Lillet’s Rosé wine is the first time in over 50 years that the renowned French company has launched a new product, and it was well worth the wait. Consisting of a blend Grand Cru Bordeaux used in Lillet’s Rouge and Blanc, plus light aromas of berries, orange blossom and grapefruit, its flavor is a delight. Lillet Rosé is best served chilled. About $18. lillet.com

[3] Mathilde Framboise Liqueur

This formula comes from an old French family recipe. Only the best raspberries are hand picked from various parts of Scotland and the Hautes Côtes de Bourgogne, to give the liqueur it’s delicacy and sweetness. Just a spoonful is all you need. Berry nice. About $14. liqueurmathilde.com

[4] DRY Rhubarb Soda

Forget about traditional tonic, or generic soda—instead, add sophisticated flavor with this soda. The tartness of rhubarb in a refreshing bubbly drink, what’s not to love? And at only 60 calories, it is a perfectly guilt free option. Great to offer those not consuming alcohol as a elegant sip. Try all their amazing flavors like blood orange, vanilla bean, apple, cherry, lavender, juniper berry, wild lime, pear and cucumber. Available online at store.drysoda.com. $32 for a 24-pack of 12 oz bottles.

[5] Blueberries for garnish

Line the bar with blueberries in white bowls so guests can nibble and play with them in their cocktails.

Chicken Tacos with Green Harissa

Posted on: March 15th, 2019 by Ellen Swandiak

Go green! These chicken tacos are a welcome party mini-bite with personality. I developed this recipe to add to a buffet made up of the colors of the rainbow. Upon discovery of these adorable, green mini taco shells, I knew this had to be the dish that took the GREEN spot on the rainbow buffet. To add to the green effect, I mixed up a green harissa—parsley, cilantro, mint, and spices— to “dye” the shredded chicken. To complete the taco, I topped with slices of of avocado, sprigs of cilantro, and skinny jalapeño ribbons.

Shortcut: instead of cooking the chicken, purchase a rotisserie chicken from your local market and shred, then you just have to make the harissa.

Other green foods to consider: spinach wraps, pesto, avocado, pea and mint soup, green salad served in cups. See our picks on PINTEREST for more fantastic rainbow party ideas and recipes.

MAKES 28 TACOS

MAKE THE CHICKEN

1 1/4 LB chicken breasts
1 bay leaf
1 tsp pink peppercorns
2 cloves garlic
1/2 tsp salt

In a large saucepan, place chicken breasts and cover with water. Add herbs and spices. Bring to a boil over medium heat, then simmer 10 – 12 min. Remove breasts to a bowl. When cool, shred completely.

GET OUT THE FOOD PROCESSOR… MAKE THE GREEN HARISSA

1/2 CUP parsley
1/2 CUP cilantro (save some for garnish)
1/2 CUP mint
1/4 CUP lemon juice
3 jalapeños, seeded, sliced
1 TB ground cumin
1 TB ground coriander
1 tsp salt
1/2 CUP EV olive oil
1 clove garlic

Process all ingredients till fully combined, but with some texture, about 1 min. Combine the shredded chicken with the green harissa.

ASSEMBLE THE CHICKEN TACOS

spinach mini taco shells
chicken mixture
avocado, cut into thin slices
2 jalapeños, cut into thin ribbons
cilantro, for garnish

Fills shells about halfway with chicken. Top with avocado slice, then garnish with jalapeños strips and cilantro.

Food Science Cookbook: Revealing the Chemical Secrets Behind Perfect Food Pairings

Posted on: October 1st, 2018 by Ellen Swandiak

This book ventures beyond convention. Instead of relying on already established complementary food pairs, this process uses the chemistry of shared molecular structures as its basis. That is, the aromatic fingerprints of each item are compared scientifically—and where they overlap, is where they complement each other. By proceeding with this method, unexpected and unusal results come to life.

The science behind food pairing started as an inspiration from James Briscioine, an instructor at ICE who interacted with Watson, IBM’s famous computer. Since then, food scientists have taught chefs that ingredients contain a complex network of chemical structures called volatile compounds. These compounds give each food its own unique flavor.

Starting with the six basic tastes: salty, sweet, sour, bitter, umami, and fat, we perceive each of these tastes via chemical reactions that take place on the tongue, mouth, and throat when we consume food. According to the book, these tastes comprise only 20 percent of what we perceive as flavor—the other 80 percent is experienced through the nose via aromatic compounds.

The book takes 58 basic foods and zeroes in on each one’s tasting profile. Each food then lists the best pairings, some surprise pairings, and how to substitute each food. A recipe most unusual demonstrates one of the pairing ideas to get you started. The book contains charts galore that beautifully spell out the options, and provide ideas for future experimentation.

HOBNOBMAG Food Science Cookbook

PEA: Sweet Pea, Pork, and Coconut Tacos recipe with accompanying pairing chart.

HOBNOBMAG Food Science Cookbook

VANILLA: The recipe for Vanilla Butter, shown on corn, with vanilla’s tasting profile.

HOBNOBMAG Food Science Cookbook

More unusual recipes: FISH: A Coffee-Cured Salmon sits on a bagel, left. GRAPE: Spice-Roasted Grapes turn something sweet into something more savory.

The book ends with more analysis of flavors, textures, tastes, and aromas that encompass the eating experience. I particularly liked the section on Aromas, which describe and list everything from Fruity to Maillard (found in baked bread, roasted meat, and chocolate).

Check out this recipe from the book for an attractive and unusual pairing of chocolate and beets. (photo at the top of this post.)

recipe

CHOCOLATE MOUSSE WITH CRISP BEET MERINGUE

This recipe delivers unexpected flavors atop a familiar foundation. There is nothing more comforting than a creamy bowl of chocolate mousse. Beets, camomile, and orange zest punch up the flavor of that classic dish, while the beet meringue adds crunch and makes for a dramatic presentation.

SERVES 6

BEET MERINGUE

3 large egg whites
Pinch of cream of tartar (optional)
1/3 cup granulated sugar
3/4 cup powdered sugar
3/4 cup roasted beet purée (or 1 cup peeled and chopped beets, boiled until very soft, peeled, and puréed in a food processor or blender until smooth)

CHOCOLATE MOUSSE

3/4 cup heavy cream
Grated zest of 1 orange (about 1 1/2 tablespoons)
1 tablespoon dried camomile flowers (optional)
8 ounce semisweet chocolate (at least 70% cacao), chopped
1 tablespoon unsalted butter, softened
6 large egg whites
2 tablespoons granulated sugar

Make the beet meringue: Preheat the oven to 150 to 200°F. Line a 13 by 9-inch baking pan with a silicone baking mat or parchment paper and coat with nonstick cooking spray.

Whip the egg whites and cream of tartar (if using) with an electric mixer until frothy. Gradually add the granulated sugar and continue whipping until stiff peaks form and the whites are smooth and glossy. Sift the powdered sugar over the meringue, then gently fold it in.

Place dollops of meringue all over the baking pan. Measure out 1/2 cup of the beet purée; set aside the remaining 1/4 cup for the mousse. Drop spoonfuls of the beet purée in between dollops of meringue, then gently swirl with a spatula and smooth into a thin layer. Bake for about 6 hours at 150°F or 3 hours at 200°F, until crisp but not browned. Remove from the oven and let cool to room temperature. Break into pieces and store in an airtight container in a cool, dry place.

Make the mousse: Combine the cream, orange zest, and camomile (if using) in a small sauce pot and bring to a boil over medium heat. Turn off the heat, cover the pot, and let steep for 10 minutes.

Combine the chocolate and butter in a heatproof bowl. Strain the cream through a fine- mesh sieve into the chocolate and let stand for 3 minutes. Whisk until all the chocolate has melted and the mixture is smooth. Stir in the reserved beet purée.

Using an electric mixer, whip the egg whites to soft peaks. Gradually add the granulated sugar and continue whipping until stiff peaks form. Gently fold the whipped egg whites into the chocolate mixture one- third at a time until fully incorporated. Refrigerate until well chilled.

When you’re ready to serve, divide the mousse among six bowls and top each with pieces of beet meringue.    

Excerpted from THE FLAVOR MATRIX © 2018 by James Briscione with Brooke Parkhurst. Photography © 2018 by Andrew Purcell. Reproduced by permission of Houghton Mifflin Harcourt. All rights reserved.

The Flavor Matrix: The Art and Science of Pairing Common Ingredients to Create Extraordinary Dishes by James Briscione

A Romantic Look at Outdoor Cooking—the Australian Way—in Wild: Adventure Cooking

Posted on: October 1st, 2018 by Ellen Swandiak

The gorgeous photos in this book absoutely take you away—to isolated beaches and rugged camping spots all over Australia. Author Sarah Glover, who grew up eating in the great outdoors,  shows you how to cook gourmet meals over a bonfire. How cool is that? She makes everything from pizza to pancakes to full dinners featuring fresh-caught fish, whole chickens suspended over an open fire, or sausages intertwined with branches of an apple tree laded with fruit. It’s a totally romantic look at experiencing the outdoors while maintaining gourmet standards.

Recommended equipment ranges from area-sourced logs and branches with accompanying camping grills, large pots, and frying pans that can take the heat. Imagine being beachside with a roaring bonfire while you scour the area for driftwood and the perfect branch for tying the fish you just caught, wrapped with spring onions and kaffir leaves. It’s a style of glamping that respects nature in all its glory. Glover explains how to determine the temperature of the fire, and how long cooking will take. This is the epitome of slow cooking, and using what’s available to gourmet heights. Local ingredients like pine needles, saltwater and hay factor into some of the recipes, which are truly unique in their approach.

HOBNOBMAG outdoor cooking

Here are some of the recipes that caught my eye:

—Hung Snags and Apple which takes lengths of attached sausages and pairs them with branches of apples, just picked off a tree. The recommended sides are a Burnt Tomato Relish and Walnut Cabbage.

—Hot Chicks are chicken wings coated in polenta, grilled, then tossed in crumbled feta and cilantro.

—Fish on Log calls for hammer and nails, thus attaching it securely to a log stripped of its bark, and set aside raging coals to cook.

—I think this might be my favorite recipes, Mustard Beef with ‘Shrooms & Black Lettuce. The mushrooms sound absolutely heavenly cooked in butter, garlic, and heavy cream, while the beef tenderloin gets coated in peppercorn and mustard seeds. Grilled lettuces complete the meal perfectly.

—Smashing Pumpkin takes pumpkin eating to a work of art—after a few hours in the coals, the pumpkin is ready to be smashed and dressed in tahini and chopped pecans.

HOBNOBMAG outdoor cooking

Of course, many of these recipes can be made on an ordinary barbecue on your deck, which is a bit more tame, but delicious nonetheless. Or, if you have some space for a bonfire at your weekend house, I encourage reading this book for inspirational dinners that will remain unforgettable in your guests’ minds.

Enjoy this recipe from the book, which douses a crustacean in two lively sauces: one with sesame seeds, the other with lemon verbena, one of my favorite herbs.

recipe

THAT BE CRAY CRAY

Feeds 2

EQUIPMENT: Camping grill

SESAME SEED DRESSING

MAKES ABOUT 1 1/2 CUPS

1 cup (150 g) sesame seeds

1∕3 cup (80 ml) rice wine vinegar
1 teaspoon soy sauce
1 cup (240 ml) grapeseed oil

Heat the sesame seeds in a frying pan until they become golden brown. Pour the seeds into a mortar and pound with a pestle until the seeds start to release their oils.

Add the rice wine vinegar and soy sauce and continue to pound. Slowly add the grapeseed oil – it will slightly emulsify. Store in a glass jar with an airtight lid until it is ready to be used. It will keep for a month.

LEMON VERBENA OIL

MAKES 1 CUP

Bunch of lemon verbena
1 bush lemon or regular lemon

1 cup (240 ml) good-quality olive oil

Pick the lemon verbena leaves from the stalks and slice them very thinly with a sharp knife (if it’s not good and sharp you will bruise the leaves). Remove the rind from the lemon and slice it as thinly as you can.

Put the lemon verbena leaves and lemon rind in a small jar, pour the olive oil over and allow to infuse for at least 2 hours. Eat within 48 hours.

THAT BE CRAY CRAY

1 live Australian crayfish (or small lobster or langoustine)
3 tablespoons lemon verbena oil (see below)
dollop of anchovy aioli (see below)
1 teaspoon crushed dried wakame seaweed

Light your fire and let it burn down until you obtain a medium heat. Put the camping grill about 8 inches (20 cm) over the coals. Just before you are ready to cook, use a sharp knife to cut through the middle of the crayfish head between the eyes, then cut down towards the face. Halve the cray from nose to tail, and remove the digestive tract and clean the guts out. Rinse in saltwater.

Place the clean crayfish on the wire part of the camping grill, flesh-side down, and cook for about 4 minutes. It will char a little, which is a good thing as this will help the flesh come away from the wire grill easily. Flip the crayfish over so it’s shell-side down and drizzle the lemon oil over the flesh.

Cook for about 5 minutes or until the flesh goes white and the shell turns bright red-orange. I like to add a little aioli to the flesh while it is still on the grill so that it gets a nice smoky flavor, too. Garnish with wakame and eat immediately, straight out of the shell.

Reprinted with permission from Prestel Publishing.

Wild: Adventure Cooking by Sarah Glover

North Wild Kitchen Features Traditional and Newfangled Dishes in this Norwegian Cookbook

Posted on: October 1st, 2018 by Ellen Swandiak

After years globetrotting, author Nevada Berg settled in Norway with her Norwegian husband and son. With a farm, and with the eyes of a newcomer, Berg learns the local traditions as she assimilates into the mountain-top lifestyle and creates her award-winning blog, North Wild Kitchen.

The cookbook breaks down those activities that are common to Norwegians: foraging, fishing, farming, hunting, harvesting, camping, baking, grilling, and frying. Each chapter begins with an explanation of Nordic culture, so you get a little lesson in the way things are done. For example, in the Foraging chapter Berg mentions “allemannsretten” a concept that everyone has the right to take from nature, whether or not they own the land. (how unlike American culture!) The idea is that you can take what you need, but make sure to leave something for others to enjoy.

HOBNOBMAG Norwegian Cookbook

Photography throughout the book showcases the simple, rustic recipes and scenes from the surrounding areas. You almost feel as if you were on a journey far away. Recipes follow the four seasons using local ingredients. Traditional foods like Meatballs with Creamed Cabbage alludes to a super-popular dish in Norway, as well as Milk Cakes, which get served up with jams, spreadable cheeses, sour cream, and butter. Hearty soups and stews using meats like venison, moose, reindeer, and hare are sure to entice.

HOBNOBMAG Norwegian Cookbook

There are plenty of recipes for bakers too. Breads, pancakes, and lots of buns and cakes will have you wanting to curl up by a fireplace, and settle in. Sour Cream Wafers and Soft Potato Flatbread Veiled work in on the sides of many meals. For sweeter pursuits, Peasant Girls is an old-fashioned dessert that combines stewed apples, with sweetened breadcrumbs and whipped cream. Plums, a Norwegian staple for 300 years, are abundant, and the excess gets made into jam for use on Custard Buns or Aniseed Wafers.

I tend to like my desserts mixed with a little savory, and thought this recipe from the book would make a nice accompaniment on a cheese board, or as a atypical dessert.

recipe

Pan-Fried Pears Wrapped in Cured Pork with Honey and Pink Peppercorns

PÆRE MED SPEKESKINKE

Salty, rich cured meat and fresh sweet fruit are a natural and balanced pairing. When pan-fried together, the crispy texture of the meat against the warm, softened flesh of the fruit brings this pairing to a whole new level. I enjoy serving these special bundles, because they’re flavorful, fresh, and quick to pull together. If you prefer, you can substitute another cured meat, such as lamb (fenalår).

serves 4 to 6

4 large pears
8 to 16 pieces thinly sliced cured pork
2 tablespoons lightly salted butter, for frying
Flaky salt
Crushed pink peppercorns
Runny honey

Cut the pears lengthwise in half. Carefully remove the cores and seeds, but leave the stems. Wrap each pear half with 1 to 2 slices of the cured pork and press the fat of the meat together to keep from it from falling off the pear.

In a large, heavy frying pan, heat the butter over medium-high heat until foaming. Add the pears, flesh-side down, and cook for 2 to 3 minutes or until the pork is golden brown and crisp. Flip the pears and continue cooking for 2 to 3 minutes or until the other side is golden brown and crisp and the fruit is slightly soft.

Arrange the pears on a platter, sprinkle with flaky salt and crushed peppercorns, drizzle with honey, and serve immediately while still warm.

Reprinted with permission from Prestel Publishing.

North Wild Kitchen: Home Cooking from the Heart of Norway by Nevada Berg

Umami Cookbook: Flavor Bombs Showcases the Fifth Taste with Aplomb

Posted on: October 1st, 2018 by Ellen Swandiak

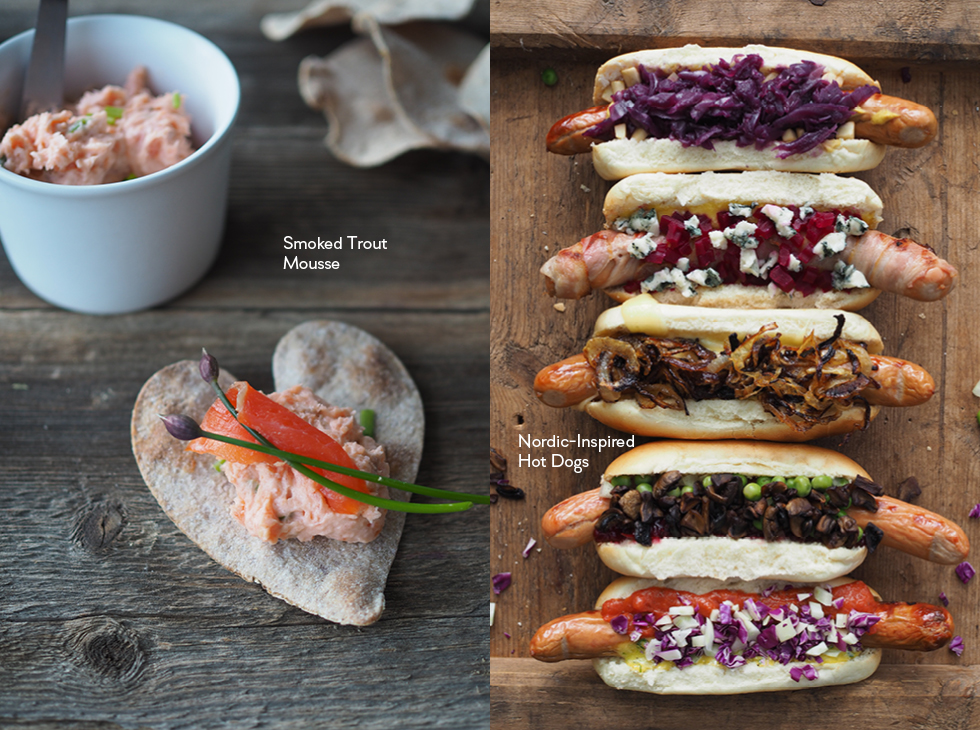
Founder of Umami Burger, Adam Fleischman takes the elements of umami and creates combinations that will have your taste buds dancing in his new cookbook. The meaty leanings of umami carry through many foods: tomatoes, mushrooms, parmesan cheese, asparagus, and much more. Fleischman loves to stack these foods together for extra spectacular results.

It all started with his analysis of the typical American burger, one with melted cheese, caramelized onions, tomatoes, and ketchup. All those ingredients are umami-based, and together really add up to much more than a sum of their parts. Same idea with pizza—tomato sauce plus melted mozzarella cheese plus mushrooms plus sausage makes it that much more special. Hence, the Flavor Bombs.

HOBNOBMAG Umami Cookbook2

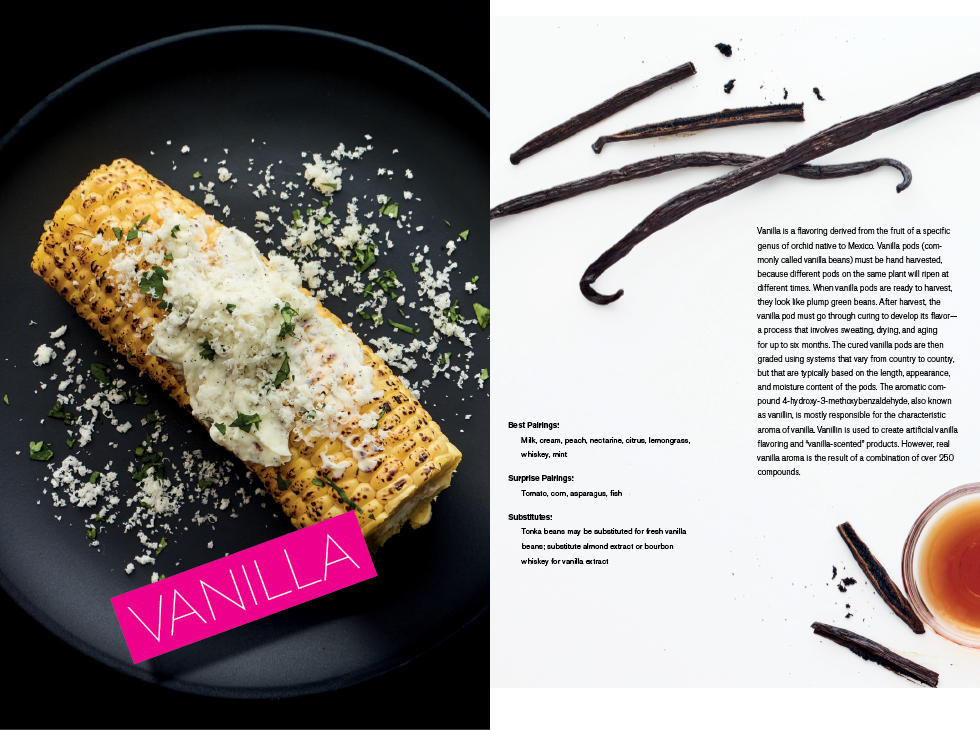
The term “umami” is a Japanese word that roughly translates to “tasty,” or “delicious.” Coined by Dr. Kikunae Ikeda who was amazed by the meat-like flavor in a bowl of dashi. It got him wondering why his soup had a distinctly savory, meaty flavor even though there was no meat in it. He would later link the taste to tomatoes, cheeses, asparagus, and meats.

Fleischman even looks at the chemicals compounds found in many umami which falls into three categories: glutamate, inosinate, guanylate. Each of these groups have a phenomenal tastes on their own, but when combined the flavor amplifies exponentially. Then Fleischman offers up the techniques for amplifying umami: searing, salting, long-cooking, fermenting, and curing in his recipes to create his Flavor Bombs.

The section on stocking your pantry to get even more impact, includes anchovies, duck fat, dried mushrooms, miso, and—are you catching my drift?

To start your umami journey, you might want to try his master recipes that can be used for many purposes. Umami Master Dust can be sprinkled on foods or used as a rub. Umami Master Sauce is perfect for use in extended cooking, like stews or braised meats. Umami Ketchup is guaranteed to wow. There are seven other basic condiments that he has designed to umami-up your cooking gauge, so you will be set.

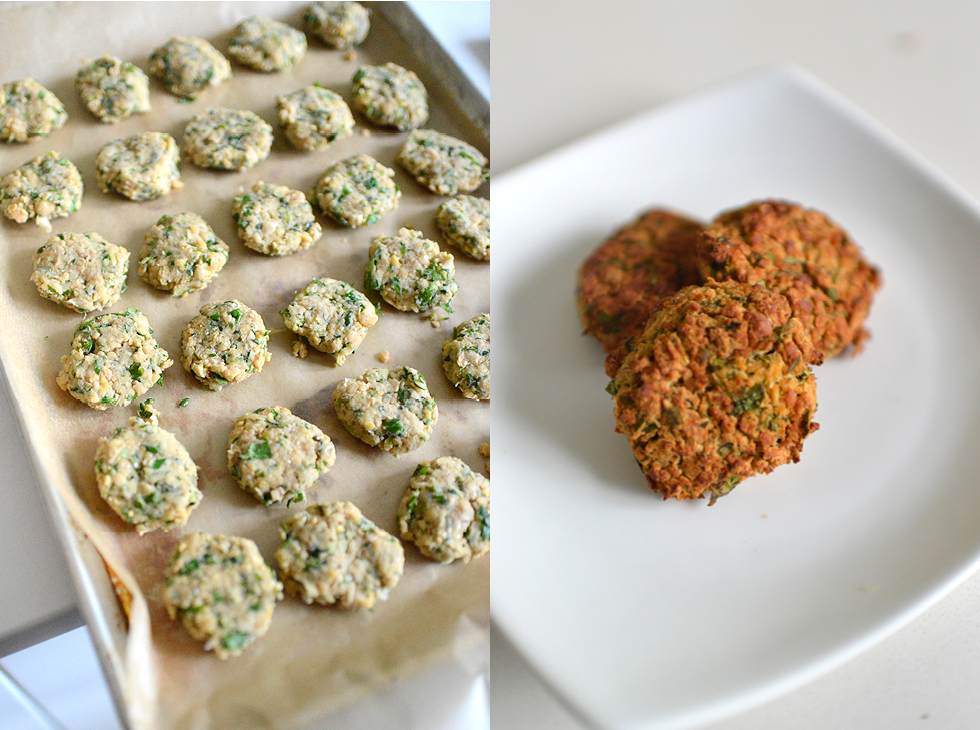
Please enjoy this recipe for a Veggie Burger from the book, and see if it doesn’t hit the spot.

recipe

Veggie Burger

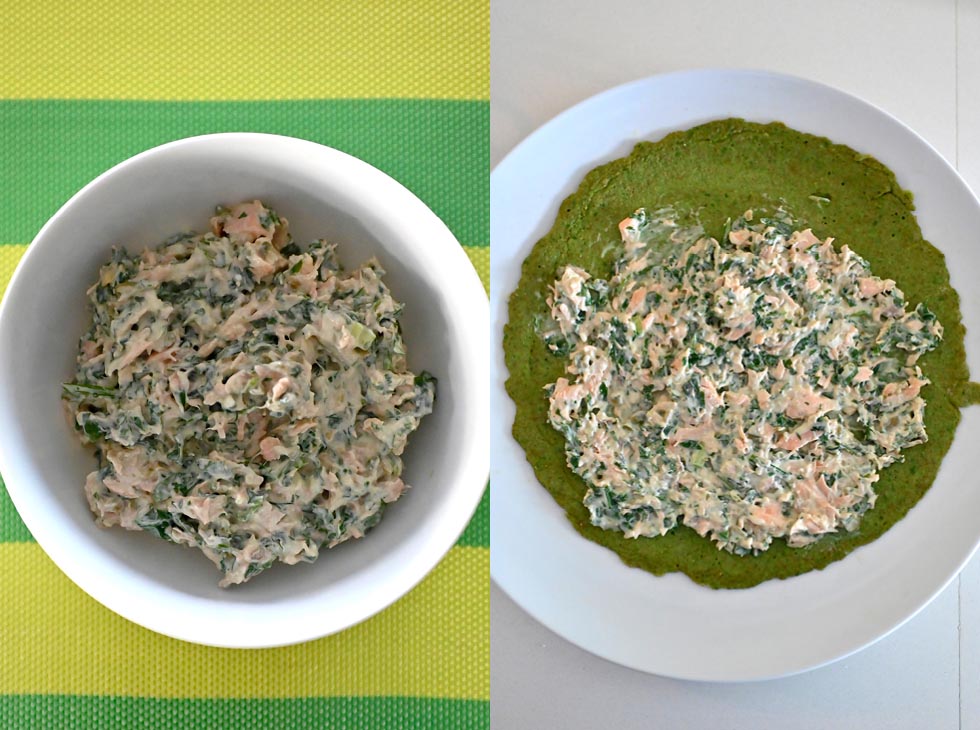
I use mushrooms as the primary component for my veggie burger and infuse them with miso, a bit of Umami Master Sauce, and egg yolks—all from the Umami Pantry—to bump up the flavor even more.

Because the patties need a few hours to set, prep them the night before and they’ll be ready to go when it’s time to start cooking.

Note: Textured vegetable protein (TVP), also sold as textured soy protein, is available at Whole Foods, health food stores, or online at Amazon.

MAKES 2 BURGERS

UMAMI MASTER SAUCE

MAKES ABOUT 3 CUPS

2 cups top-quality tamari or soy sauce
1/4 cup plus 2 tablespoons sherry wine
1/4 cup dried wild mushrooms, like porcini
1/4 cup red or white miso
1/4 cup honey
1 tablespoon Marmite
1 tablespoon shio koji
Hot sauce
1 (4-by-4-inch) piece dried kombu

Start with the tamari or soy sauce, in a pan over medium heat; do not let boil. Add the sherry wine, dried wild mushrooms, and miso. Stir.

Add the honey, Marmite, shio koji, some hot sauce, and the dried kombu. Stir for a minute, remove from the heat, and strain. Add water to taste to dilute its intensity, then cool.

Store, covered, in glass jars for up to around 6 months in your pantry.

VEGGIE BURGER

4 dried porcini mushrooms
1/4 cup medium-dry sherry, like amontillado
1 tablespoon white miso
Splash of Umami Master Sauce (see above)
2 large egg yolks
1/2 cup panko bread crumbs or textured vegetable protein (see headnote)
2 tablespoons toasted or regular sesame oil
1 cup stemmed and sliced fresh shiitake mushrooms
Sea salt and freshly ground black pepper
2 potato buns or white hamburger buns, split
unsalted butter

OPTIONAL CONDIMENTS AND TOPPINGS
Mayonnaise
Ketchup
Mustard
Lettuce
Tomato

MAKE THE VEGGIE BURGER

Place the dried porcinis, sherry, miso, and master sauce in a small saucepan. Set the heat to medium-low and simmer until the liquid is almost gone, rehydrating the mushrooms, about 10 minutes.

Remove the pan from the heat, cool, then add the egg yolks and panko (or textured vegetable protein). Pulse the mixture in a food processor to incorporate. Set aside.

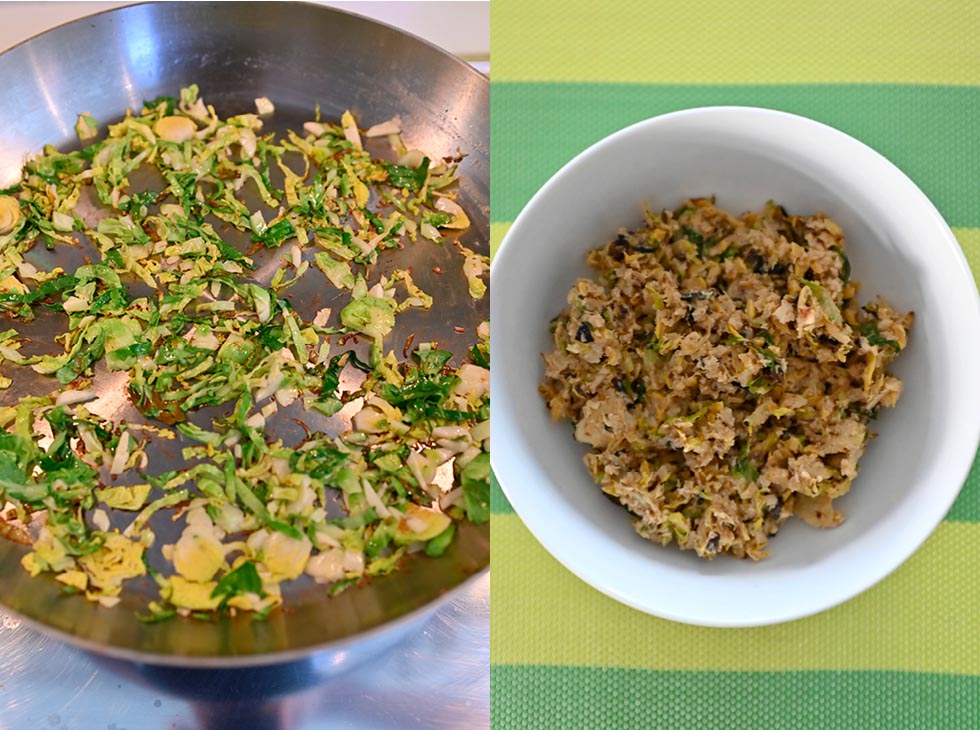
Heat a large skillet over high heat for a few minutes—you want it to get superhot. Add 1 tablespoon of the sesame oil, wait a minute, then throw in the shiitakes, being careful not to crowd the mushrooms. Season with salt and pepper, and sauté until they’re nicely caramelized, about 6 minutes. Remove the mushrooms to a large bowl and let cool.

When the mushrooms have cooled, add the egg yolk mixture and stir to incorporate. I use a 3-inch ring mold to press out the patties, but if you don’t have a mold, free-form 2 patties with your hands. Be sure to pack the patties fairly tight so they don’t fall apart when you cook them. Refrigerate the patties at least 6 hours or overnight, to set.

You can also place the patties side by side on a baking sheet or dish and stick them in the freezer; when they’re frozen, place the patties in an airtight bag and keep them in the freezer for up to 2 months. Thaw completely before cooking.

When you’re ready to cook, heat a large skillet over medium-high heat with the remaining tablespoon of sesame oil and sauté the patties for 3 minutes on each side. Remove the patties and set aside. Place the Koji-Porcini Resting Sauce or butter in the pan and place the buns cut side down in the pan for a few minutes, just until they’re toasted and warmed through.

Place the patties in the buns and serve with the condiments and toppings of your choice.

Flavor Bombs: The Umami Ingredients That Make Taste Explode by Adam Fleischman

Excerpted from FLAVOR BOMBS © 2018 by Adam Fleischman. Photographs © 2018 by Wendy Sue Lamm.  Used by permission of Rux Martin Books/Houghton Mifflin Harcourt. All rights reserved.

Vegetarian Tea Sandwich: Beets & Apple & Curry

Posted on: August 31st, 2018 by Ellen Swandiak

Sweet, crunchy golden delicious apples pair with creamy beets in this stunning vegetarian tea sandwich. The special ingredient that makes this sandwich sensational is the Good Spoon Vegan mayo [NOT SURE IF THEY STILL ARE IN BUSINESS], which works so well with all the components, and has that super bold color. In lieu of this mayo, I would suggest adding curry spice to mayo to get a similar effect. I love that these look like cake, due to the black pumpernickel bread from Northside Bakery in Brooklyn. I found it in my local health food store. 

The quickest way to get these sandwiches done is to purchase already cooked beets which seem to be available a better stores. If you can’t find them precooked, then boil in salted water till tender, about 35 min. 

MAKES 16 TRIANGLES

MAKE THE BEET/ CREAM CHEESE MIX

2 med beets, precooked, diced
4 oz cream cheese, softened
1/2 TB poppy seeds
pinch salt
pinch white pepper

With a fork, mash together the beets and cream cheese, until beets really meld into the cream cheese, then mix in the rest of the ingredients.

MAKE THE SANDWICHES

4 slices Northside Bakery Pumpernickel Pullman bread
beet/cream cheese mix
The Good Spoon Curry Vegan Mayo
3 golden delicous apples, cut in half, then sliced thinly

Place bread side by side. Spread cream cheese mix liberally on one slice. On the other slice, spread about a TB of the mayo. Layer rows of the apple slices on top of the mayo. Close sandwich, press to unite both halves, and trim the crusts off.

Cut on the diagonal into 2 triangles, then cut those in half so that you end of with 4 triangles. Cut those 4 triangles in half again, so that you end up with 8 total.

Hearty Vegetarian Sandwich: Naan with Falafel & Avocado-Tomatillo Sauce

Posted on: August 31st, 2018 by Ellen Swandiak

Sandwiches are nice to serve at a dinner party, as long as they are special. This hearty vegetarian sandwich has a slew of heathy ingredients that combine for a true taste sensation. Chickpeas, roasted carrots, zucchini, and a super fresh sauce with avocado and tomatillos sit in a min naan.

I will admit, this recipe took some time to accomplish because of the soaking time involved, but was not hard to make—and were definite crowd pleasers. Using the dried chick peas really adds to the final product, you just have to remember to soak a day ahead, for great results.

The sandwiches are great at room temperature, and supply a hearty bite for guests they can just grab and go. Be liberal with the sauce, it really adds a freshness and needed moisture to the mix.

MAKES 22 SANDWICHES

DO AHEAD: SOAK THE CHICKPEAS

3 CUPS dried chickpeas

Pick through chickpeas to remove any debris. Rinse in a colander. Place in a large pot, topped with 4 inches of water. Cover. Soak overnight. OR bring the chickpeas to a boil for 5 min, then let them soak in the water for 1 hr.

COOK THE CHICKPEAS

soaked chickpeas, rinsed well
bay leaf
black peppercorns
2 cloves garlic

1 tsp salt

Add all ingredients, except salt, to a large pot with 4 qts of water. Bring to a boil, then simmer for 1.5 – 2 hrs. Check occasionally to make sure there is enough water in the pot. When chickpeas are nice and soft (they smash easily with the back of a spoon), turn off the heat, stir in salt, and allow them to sit in the water and cool, and soak up the salt.

When cooled, drain, and mash with a potato masher or pulse in a food processor.

PREHEAT OVEN 425ºF… ROAST THE CARROTS

16 carrots, cut into 3-inch sticks (about 5 CUPS)
olive oil
1/2 tsp salt
1/4 tsp pepper

Drizzle carrots in olive oil, s + p. Place carrot sticks on a parchment-lined baking sheet. Roast for about 17 min until they are soft and slightly browned on the edges.

REMOVE MOISTURE FROM THE ZUCCHINI

2 CUPS zucchini, grated

Spread zucchini on a large plate or shallow bowl, sprinkle with salt and let it sit for an hour. Drain the liquid that has oozed out, move to a strainer, and press out any more remaining liquid.

PREHEAT OVEN 400ºF…MAKE THE FALAFEL PATTIES

cooked chickpeas
zucchini
2 cloves garlic, minced
1 CUP parsley, minced

1 1/2 tsp chili powder
1 tsp ground cumin
1 tsp ground coriander
1/2 tsp salt
1/2 tsp black pepper
1 1/2 TB garbanzo fava flour

Get out the food processor. In batches, pulse chickpeas, zucchini, garlic, parsley. (Or you can mash with a potato masher and fork.) Transfer to a large bowl, add the spices and flour and mix well.

Take a heaping TB of the mixture, place into center of palm, roll, then press into 2-inch patties. You should have around 44. Place on 2 baking sheets lined with parchment. Bake for 45 min, till nicely browned.

MAKE THE AVOCAD0-TOMATILLO  SAUCE

1 avocado, cut into chunks
4 tomatillos, cut into chunks
1 CUP parsley
1 CUP cilantro
2 cloves garlic, cut into chunks
1/2 cup water
1/2 cup olive oil
1/2 tsp salt
pinch of cayenne

Pulse all ingredients in a food processor until incorporated. Makes about 2 cups of sauce.

HEAT THE NAAN

22 Stonefire Mini Naan

The naan only needs a minute in the oven to come back to life. So just as many as you can fit onto baking sheets.

ASSEMBLE THE NAAN SANDWICHES

avocado-tomatillo sauce
falafel
roasted carrots
1 cucumber, sliced thinly

Slather on a TB or more sauce onto the inside of the naan. On one side of the bread line with roasted carrots, place 2 falafel on top, 3-4 cucumber slices on the other side. Close bread and pierce through the falafel with 2 toothpicks so it holds together.

HOBNOB Magazine